
follow the first step to my tutorial to my nesting heart basket to get to this point. click here
you can do this braid rim on round square or rectangle. Heart shape may be little hard to do but not impossible. Use #2 or thinner round reed. you can do with #3 but it gets hard to handle. keep in mind to keep the reed moist by spraying them often to avoid breakage.
Follow part 1 of the detailed tutorial here again


once you are done with part 1
start part 2:
again start with left set and right set next to each other.

 Lay the left set on top of the rounded reed like the picture and the right set becomes the left set, switch hands and continue until all done.
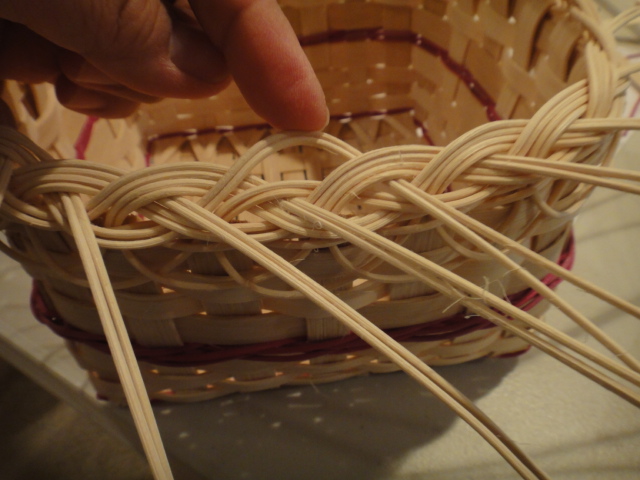
here is a better picture. Continue this pattern all the way around.
Part 3: working on top braid
 grab a strand of your choice, and follow the set that is already weaved and lay it on top and stick the end from inside to out side of the basket


make sure they don't get twisted!
all the way around.
until the last one, pull it through like the rest of the strands.
Part 4: working on the bottom braid

 take a set, and into the hole to the right making sure that it lays on top of the bottom portion of the braid already made.
pull it through and continue with the rest of the sets.
Part 5: working on the inside. follow the part 3 and 4 of the triple heart braid and you are done! make sure you wait until its fully dried before cutting the round reed!
I'm not sure if the pictures are good enough for you to follow but next time I make this top I will take better picture and re do the tutorial!
wow! thanks for the tutorial :D
ReplyDeleteThanks for visiting Swetha!
ReplyDelete