baskets

baskets

Monday, October 31, 2011

Carving pumpkin


I wanted to share with you how I carve a pumpkin.  There are many different ways to carve and I don't think there is right or wrong way just like weaving basket and this is my way and I've been doing this way for a while.  Each year I get pumpkin for each one of us, hoping for one day able to carve our own pumpkin and have a contest to see who carved the best pumpkin but somehow I always end up carving all the pumpkin each year.  Each year my husband would ask me to carve his, and make a Red Wings logo,   Each year I carve him one.  Last year I went with Al the Octopus (Red Wings mascot) but all the other year it has been pretty much Red Wings.  I think I may have carved him Luther's seal many many many years ago but for the last 5- 6 years it has been Red Wings.  So this year when I saw this giant pumpkin that looked like it was taking a nap, I thought it would be perfect for Red Wings logo

If you already know what you want to carve, picking out the pumpkin is easy.  If you are doing a traditional Jack-o-lantern then any pumpkin.  After you pick out your pattern and pumpkin, match the pattern to fit the pumpkin by re-sizing the pattern.

Not sure which is the better option like the traditional cutting the top off and scraping out the guts.


Take the top off, trim it and then scoop out the guts!


its all clean!


Or my cutting out the bottom of the pumpkin or where it will be the bottom (I do it this way now)


start by cutting the bottom of the pumpkin or where it will be on the ground or a table in a angle and go around .  Pull off the opening and cut off the stringy seedy mess, scoop out the guts and scrape a little to make your carving easier just like if you cut the top.

either way you cut the pumpkin  you'll need a pattern, which you can find on the internet for free or make your own. tape it to your pumpkin. (you can also free hand by drawing on the pumpkin its up to you.

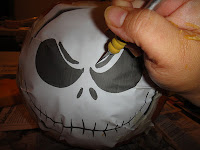
Some carving kits comes with a pattern poker to poke around the design to mark where you are supposed to cut but I get confused when doing intricate designs so I use a knife to cut out the paper and mark the pumpkin at the same time. This way you know you don't miss a thing.


Hard to see on the picture but you should see a cut out line.  this is where you "saw it out" with what??
with these tools I use!


after sawing you'll get something like this.  then I use this tool.. its wood carving tool but comes in handy for pumpkin skins. If I notice my saws going dull or to bendy, I buy one after Halloween on 75%off and save it for next year.  Wood Carving tool will last a long long time.  I've had these for about 4 years and still going strong!


After scrape off the orange skin then use something like this to smooth out the white flesh.  Here on the right is a polymer clay tool
 that is it! now wash it well, put candles in and enjoy them..  if you cut the bottom off, its easier to light the candles!

Happy Halloween!

 my 5 year old carved this one using the little pumpkin he got on a field trip with his Kindergarten class
 HAPPY HALLOWEEN!


Monday, October 24, 2011

Pao de Queijo Brazilian Cheese puffs

Several months ago my husband and I went to this event called Devour Downtown Indy with his siblings and their spouses (minus one boring sibling and wife).  We went to Fogo De Chao which is a Brazilian Steak House! have you been there?? its insane! all you can eat place where gauchos (Brazilian dudes) brings you chunk of meat on a sword to your table and cuts off a slice on your plate.  Anyway they have tons of different kind of meat and poultry and you can keep eating until you are stuffed and can't breath anymore.  They also bring you these cheese puff bread and they are sooo tasty! its cheesy puffy and light.  one of my sister in law was not a fan but other sister in law and I thought they were simply divine! While surfing the net I stumbled upon this recipe and decided to give it a try, you use a blender so its really simple! here is a Link to the cheese bread.

In a blender add eggs
 Milk and oil


Cheese and tapioca starch
 blend well

 in a mini muffin tin and bake


I had to change my cooking time and lower temp wee bit due to my muffin tin being really tiny compared to normal mini muffin tin and darker so they baked darker.  They where cheesy and tasty and light yummy.  Next time I may use the cheese they recommend.

Friday, October 21, 2011

black and white angel food cake


I wonder if you had a throw down between Paula Dean and Ina Garten, who would win? I know in a fun department Paula would win hands down.  Personally I think they are both great cooks but very different. Cooking with Paula would be like cooking with your aunt in her country kitchen having tons of fun while sipping on a ice tea and melting a stick of butter to put it in anything because butter just makes everything tastes good.  While cooking with Ina would be cooking with someone's aunt who have traveled abroad and has knowledge of different culinary styles and you would learn tons of new things.  I would love to cook with both of them!!! Psss if you know either of them tell them I want to cook with them!!! 

Why am I talking about them? well no real reason for Paula (I just love her) but today I'm sharing a cake I made using Ina's recipe that's why!  I normally have frozen egg whites in my fridge because when I make cream puff I don't want to throw away my whites so I double zip-lock it and freeze it.  I do write on the baggie how many egg whites are in there.  So when I thought about baking a cake, I naturally went to the egg whites and what kind of cake do you make with egg whites? Angel food cake! but I didn't want to make plain old Angel food cake so I did a little internet search and found Ina Garten's Black and White Angel Food Cake it not only has a chocolate glaze, there are shaved chocolate in the cake! YUM!! 

BTW I didn't have heavy cream for the glaze so I did another search for substitution and they (Joy of Baking) said to add 1/3 cup unsalted butter to 2/3cup milk to make 1 cup Heavy cream substitution. Here is a link to find Substitution.  Her recipe called for 2 cups super fine sugar but I think with all that chocolate, its too much so I cut it by 1/2 cup and used 1-1/2 cup of super fine sugar.  

Happy baking!

Thursday, October 20, 2011

Making handles

As I mentioned in my last post, here is a tutorial to make a simple push in handle using round reed.
(I made the mini loaf 2007 in Halloween colors)
Things you'll need:

Round reed (size will depend on the size of the basket you are making but I say you'll need at lease #6 or bigger. I used no 8 round reed for these handles.

Sharp knife
twine or large Zipties
band aid (just in case)
pan or bucket of water
tape measure
pencil


first you'll need to make your basket and stop before putting the rims on.
measure the basket to size your handle.


Here I decided to make them 8-1/2  inches long, 4-1/2 inches long from notch to notch.  You'll need to guesstimate how long you want to make them, and cut it to length.   First soak the round reed for several minutes then find the half way point of the reed, bend it half way point to figure out how tall you want the handles to be.


mark them with a pencil on both side (they should be even) then depending on size of your rim, mark on the other side of the round reed towards the ends and cut less them half way through the reed.  If you go more they will be too weak so make sure you only go about 1/3 of the way.  try to see if your rim reed will fin in the slot you made.  Make sure to cut the same on the other side making sure the round reed do not roll or twist.


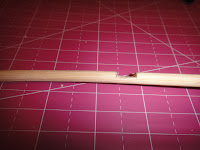
Shave the ends bellow the notches you made like the picture, on the both side.   (shave more off the other side of the notch like the picture) Soak it in a bucket of water for several minutes again then tie it with a twine or use a large ziptie and shape the handle.  You would want to make it smaller then you want them to be because once its dried and you undo the twine it will naturally expand a bit.  I would wait until its completely dried before attaching to your basket because when its wet it will expand.  I have never tried it but I'm sure you can blow dry it to shorten the waiting time (I would use cool air).


Attach your  dried handle like you would normally attach a closed notched handle rim and lash.  (I do love my lash buddy)

*****I think I made the handle too tall for this basket, If you make a handle for this basket (mini loaf basket 2007 pattern link on my last posting) I would cut it at 8" long and mark them 4" notch to notch, so find the half point mark 2" on each side of the center line and mark 3/8" on the other side.

Monday, October 17, 2011

Mini Loaf Basket

Hi all! sorry about the neglect yet again, but I've been running around like a chicken without a head and finally, I think I got grasp on things and maybe I will be back to posting as I once started and hopefully keep up because I have lots I want to share with you.  Today I'm going to share with you a basket pattern I got from Basket Maker's catalog and its called Mini Loaf Basket 2007 Only thing I did different was the handles.  I saw the pattern, I had everything but the handle they called for so I made my own handles. 

This Thursday I will post a tutorial on making your own handles !

This basket looks smaller than it does, hence the name "Mini Loaf Basket" in our house it be single person loaf! we love our bread! especially freshly baked bread!