baskets

baskets

Tuesday, August 30, 2011

pineapple upside down cake

 last Friday, I didn't have a chance to post but I made pineapple upside down cake.  Its a simple fool proof recipe by Better Homes and Gardens that I've used for years which you can make it in a pinch if you have the pineapple and the cherry available in your pantry.  ok you don't really need the cherry but pineapple is a must.. a can of pineapple, maybe an item you should always have stocked in your pantry just like the pear slices in case your in-laws or someone drops by without any warning and you need to make a quick something! My other quick fix desert is the pear tart, (click here if you haven't seen it yet) 

2 Tbsp butter
1/3 cup packed brown sugar
1 Tbsp water
8 oz can of pineapple slice
maraschino cherries cut in half
1-1/3 cups flour
3/4 cups sugar
2 tsp baking powder
2/3cup milk
1/4 cup butter softened
1 egg
1tsp vanilla

turn your oven and set at 350F, melt butter in your 9" round cake pan in the oven while you gather all your ingredients. 


once the butter melts, add brown sugar and water, melt well. 
Arrange pineapple and cherries in the pan how ever you like set aside

in a medium bowl stir together flour, sugar and baking powder, add milk, 1/4cup butter, egg and vanilla, beat with an electric mixer on low speed until combined, beat on medium speed for 1 minute.  Spoon batter into pan, bake for 30-35mins or until toothpick comes out clean.

 Cool in pan on wire rack for 5 minutes.  Loosen side; invert onto a plate, serve warm!

I'm really sorry, I forgot to take a picture of the cake inverted!! but you can pretty much guess how it turned out. 


Monday, August 29, 2011

Large hearth basket


This is a basket I made while back called Hearth basket.  you can add colors and or add basket charms or buckles.

its a simple basket to make so even if you don't have a lot of experience with basket weaving you can make this! 

Don't forget the D handles should not be soaked!! so if you need to wet the basket spray rather then dip in a tub of water!! I did that when I first started making baskets and was really sad when it fell apart and I was not experienced enough to figure out how to salvage it.  I now look back and think how silly, I could have shoved the handle back down and glued it !!! oh well, you learn from your mistakes right?
 
10X14 D handle
5/8 inch flat (stakes and weaver)
3/4 inch flat (rim)
1/4 inch flat (lashing)
No.2 round
Sea grass

Mark center of the handle
Cut 5/8” flat (mark all at center and write the length on ends)                                
                                                          9@ 27”
                                                          2@ 26"
                                                          2@ 28”
                                                          2@29”
                                                          2@30”
                                                          4@32”

 (you can cut all pieces 32 if you don't want to keep track of what's what but it be wasting lots of reed)

Lay 4 of the 27” stake horizontally space them evenly about 1-1/2” apart, lay the handle over them, lay the remaining 5 pieces over the handle in between the spaces of the 4 stakes under the handle.
 
(if you want a solid woven bottom use 3/8” flat  8@ 19” then lay the filler reed under the handle spaced evenly, then lay the stakes over the handle weave, wet the filler cut down the reed long way fold over and  V tuck the ends then twine twice with no2 round reed)


Weave in vertically starting with the longest piece on each side of the handle until all 12 pieces are woven in (6 on each side)

Base should measure about 9-1/2”X 14-1/2
Twine twice using no2 round reed

Spray it down well and then upset stakes

Weaving 4 rows with 5/8” flat 

Begin weaving only the long side, fold the end behind the stakes so the ends are hidden.  After each row drop the ends and continue to weave this way until you wove each stake next to the handle. The last stakes that sandwiches the handle should be woven on the inside and fold over the front hiding the ends behind the handle.

Cut and tuck, trim the outside corners of the tucked stakes to give it more of a angle and it won't stick out as much.

Rim using 3/4" flat , inside first, wrapping around the handle, then outside wrapping the handle, insert sea grass, lash with 1/4” flat. decorate if you like! 

if you want to braid the top, instead of tucking twine 3 times with no2 or 3 round reed. then tuck all stakes, cut 44 pieces of 22" of no 3 round or 30" of no2 round depending on the type of braid you want to do.  I have 2 different braid tutorial on here!

**if my instruction is not clear please feel free to send me a note, I'll try to explain it better or take pictures of the steps!
 Happy Weaving!

Friday, August 19, 2011

square scrap basket with braided top

Happy Thursday! (ok its really Friday, we went to the fair last night so I was not able to post last night!) Today I'm going to share my basket pattern I pulled out of my scrap bin.  what does that mean? well, its a simple square basket with braided top but I pulled out reed that looked long enough from my scrap bin and made this basket.  I had several different sizes so its a puzzling pattern but I think it works.  So if you have a big scrap bin like I do (I have 14 people making baskets in my basement so we have lots of scraps) dig in there and weave this basket!


5/8 “flat cut 8 @ 22”  (stakes)
1/2” flat cut 6 @ 22” (stakes)
3/8” flat cut 6 @ 13” (filler)
No2 or No3 round (depending on the braid you plan on doing)

 cut all stakes and filler, mark center of the rough side, then soak it.

laying out the stakes and the filler. 

lay out the stake 5/8", 1/2", 5/8", 1/2", 5/8",1/2",5/8"  making sure to leave about 1/2 inch in between each stake, take 1 of the 1/2" and lay it vertically over the center line.
take the filler 3/8" and lay it horizontally in between the horizontal stakes you previously laid down over the 1/2" vertical stake.

weave the rest of the stakes in this order on each side of the center 1/2" vertical piece. 5/8", 1/2", 5/8"

measure the base to 7"X7".  now fold the filler and cut down the center length wise and V tuck.


twine around the base with no.2 round once (natural or dyed your choice)

wet the reed and up-stake the side

Now we weave!
3 rows of 3/8” flat
1 row of 5/8” flat
 2 row of no. 2 round dyed double twine or you can just weave with round reed several times 
(its just like triple twine but using 2 round reed instead of 3 here is a triple twine tutorial)
1 row of 5/8” flat
3 rows of 3/8” flat
Twine twice no.2 round

Wet the stakes and tuck all (do not cut!)

we add the braid.  You can either do basic braided rim  or the other braided rim your choice.
if you are going to do basic braid use no3 round reed and no2 if you want to do advanced braid.

enjoy your basket!


Sunday, August 14, 2011

Call me a slacker

Its Sunday again and I didn't post about my newest basket on time again! I do have lists of excuses but I'm sure you don't want to hear my excuses, you want to see the basket pattern right? I've been really digging Suzanne Moore's baskets lately and this week (well last week) I made Suzanne's Wrought Iron Curl Basket I really like the wrought Iron handle I think its really cool and somehow it make the basket feel sturdy not to mention it looks really nice.  One thing I didn't follow on her pattern is that I did not use the maple strip but instead I used very thin flat reed that I had saved for such occasion! When I open a pound of reed and find some that are thinner than average I save them for curls.   Not sure if you can find wrought Iron at your local craft store but Suzanne has them in different sizes and they are very reasonable priced! I always buy the Wrought Iron handles from her!

Tuesday, August 9, 2011

Mount Blanc Cake

When we where little, our parents would buy or bake us a cake, when you get married and have kids, you don't get a cake on your birthday.  I not only do not get a cake on my birthday but since I share a birthday with one of my son, I get to bake a cake on my birthday for someone else.  When I started teaching basket weaving I decided that on my student's birthday week I'm going to bake her a cake and we'll sing her a birthday son and share a slice of cake and coffee and have a little celebration.  This week I made Mount Blanc Cake, its not that popular in US, actually may not be known in US unlike in Japan or in Europe.  I normally make a individual size or a roll cake but since it was for my class and my class size can vary week to week, I decided to make a 8inch cake.  The sponge I normally use is little more dense because you only use thin slice like Madeline thickness, then you put a mound of pastry cream, then cover it with whipped cream then drizzle chestnut cream over that and you decorate it with a chestnut. If you are going to make this cake whole like this, I think you should use different cake recipe, this cake recipe will be good for individual size.

here are the ingredients:

 for the cake:
4 eggs separated
1/2tsp cream of tarter
150gm white sugar
130 gm cake flour
60ml milk
40gm butter

Pastry cream:
100gm egg yolk (save the whites in a baggie, mark how many and freeze it for angel food cake)
I use this instead of peeling and cooking my own


500gm milk
100gm sugar
40gm flour

Chestnut cream:
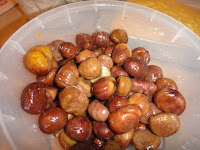
450gm chestnut peeled and roasted or boiled
90gm sugar
30gm butter
180gm milk

whipped cream:
3 cups milk
3 package Whip it
1/2 - 2/3 cup sugar (to your taste)

extra chestnuts soaked in simple syrup for topping

Bake a cake:


use a mixer and beat egg whites and cream of tarter until it starts to bubble, add about 1/2 of the sugar and whip until stiff peaks! set aside,


in another bowl, beat yolk and sugar until ribbon state.  Yolk should look pale yellow.

in a cup melt butter in milk in a microwave tad warm (not hot!)
slowly add the milk egg mixture into the yolk
slowly add sifted cake flour into the yolk and incorporate.  do not over mix!!!


now take a balloon whisk and take a 1/3 of the white and mix it into the yolk mixture, then add a 1/3 more but this time mix gently to make sure you do not flatten the white, and then add the rest


pour the mix into lined cake pan and bake in 350F oven for 30 min.  Cool completely, then peel off the liner, and slice in half-thirds


Pastry Cream: heat milk, butter and 1/4 of the sugar in a pot, while heating beat yolk and sugar until well mixed and in ribbon state (pale yellow) then add flour and mix until smooth.
when milk comes to a boil, remove from heat, pour a little of the milk in the yolk mixture while whisking.  Continue to mix and add a little more hot milk to the yolk until all incorporated.  Pour it back to the pot and heat on Med heat.  Continue to stir to keep the bottom from burning.


The mixture will continue to thicken and once the mix forms a bubble remove from heat. put in a pan and set aside to cool.


Chestnut cream:
I used the hand blender but food processor most likely be easier but more to clean.  heat up the chestnuts, milk, sugar and butter

 work while its hot, it blends easier
 keep blending
You should have a creamy paste, set aside


whip cream: take the cream ingredients and whip it until stiff! don't over do it you'll end up with butter!!

Now we put it together!

If you have 3 layers, just fill both layers with thin pasty cream instead of one thick fill like I did with mine.

I piped the pastry cream
 Spread it evenly
 Top it
decorate with whip cream
then each spot you want, pipe a mound of pastry cream cover that with whipped cream then drizzle with chestnut cream.  I use big grass piping tip.  Not the small regular one.  then top it with chestnut that was sitting in simple syrup.

Thursday, August 4, 2011

tissue box cover


Wow! I can't believe I skipped over a week of posting!! I've been quite busy going on short weekend trip with my family, getting my youngest ready for Kindergarten,  nephew and niece's birthday parties, sick husbands you name it, I've been dealing with it!! well I think I can almost see the light at the end of the tunnel! I'm going to try to keep up with my post and share more crafts I'm going to be doing!! I have list of things I want to work on.. only if I had more time! oh wait, my youngest will be going to school full day every day M-F so maybe I will have more time for craft! Enough about my life, but let me share with you what I finished last week but didn't get around to posting!! I planned on it but just didn't get around to it till today! The pattern I used came from  NC Basketworks called a touch of elegance.  several of my friends ordered the tissue box cover base from her and made this cover, I just happened have a square tissue box cover and wanted to make one like this so I incorporated her pattern to fit my top. I think it came out pretty good.


I used  28 flat reed as a stakes and basically eye balled it to make it look like the pattern but in the square box shape.