I saw a basket I really like on line and It became a inspiration for this double wine basket.
I also made another version using the same pattern but used different color and changed the decoration a little to give it a different look.
You'll need:
5X14" D handle
5/8" Flat Flat cut 6 @ 27" and 5 @ 30"(stakes)
3/8" flat flat cut 4 @ 13" (filler)
#2 or #3 round natural or dyed (twine for the base)
1/4" Flat Flat natural long piece (divider)
3/16 Flat Flat or Flat oval (lashing)
#3 Sea grass
3/4", 7/8", 1/2",1/4", 3/8" your choice of weaver in your choice of color. Best to use 1/4" or bigger for the weaver so the divider will hide well.
I used 1/2" natural, 1/4" and 3/4" dyed wine red and 3/16" Flat Oval natural for crisscross
the purple one I used 1/2" and 3/4" natural and 1/2" and 1/4" dyed purple and 3/16"Flat Oval for the crisscross decoration and lashing.
My sides are as follows:
2 rows 1/2" flat flat
3 rows 1/4" flat flat
4 rows 1/2" flat flat
1 row 3/4" flat flat
4 rows 1/2" flat flat
3 rows 1/4" flat flat
2 rows 1/2" flat flat
I found this unfinished wooden tag at JoAnn's and painted a cluster of grape to go with the "wine" theme.

cut all your stakes, mark center on the rough side with a pencil and soak briefly in warm water.
lay out the five 30" pieces rough side up horizontally leaving about 3/8" space in between, matching the pencil mark, lay your handle vertically on top of the pencil marks.
lay the 3/8" fillers in between the 30" pieces on top of the handle.
now weave the 27" stakes, 3 on each side of the handle.
Base should be about 5"X 8"
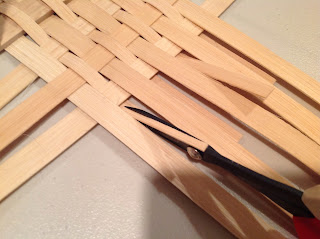
cut the filler down the middle to the last stake
then fold over and tuck like the picture
twine once with #2 or #3 natural or dyed its up to you. I used natural for the red wine one and for the purple one, I used the same periwinkle as the crisscross and the lashing
spray down the stakes and upset them.
Start weaving the sides but make sure the first row weaver ends up on the outside for the handle.
after two rows we'll start the divider. This is the way I do it, Its my way and it may not the "right" way if there is even a right way and a wrong way, its just my way and I've done it this way for years and my baskets have not fallen apart so I'm not going to change the way I do this.
Place the end of the long 1/4" flat flat don't matter if its rough or smooth side on the handle.
hold it with clothes pin to keep it in place.
Some people like to over lap once and you are more then welcome to do that as well but I think it makes it too bulky and the divider pushes out the weaver and its kind of ugly in my opinion. once you are done with the basket and you are still worry about the divider untucking, you can glue it in place.
start weaving the 3rd row, I used 1/4"flat flat dyed in purple for this basket. and once you reach the handle you started the divider on,
move the clothes pin, place the weaver over the divider, hold it with clothes pin until you finish this row.
Before your weaver reach the other side of the handle, cross the divider to the other side like you are doing half a figure eight making sure you don't twist the divider, then finish this row as you normally do. the pressure of the weaver should keep the divider in place but for now you can keep the clothes pin on the starting point of the divider if you like.
weave the next row without moving the divider

Before you weave the next row, wrap the divider in the figure eight on the both side of the handle.
(the divider is placed under the weaver that is woven outside of the handle)
Sorry bad picture but just wanted to tell you that it might be easier to move the divider around if you keep the end rolled up.
Continue to weave and move the divider every other row. make sure that the divider is hiding under a weaver and also make sure that the divider is tight but not so tight that it warps the handle.
don't place the divider on the top row because that is the rim row and you won't be able to place the rim correctly if you have the divider.
stick the end of the divider in between the rim row and the one row below, pull it through, pack down the sides well, cut the inside stakes and fold the outside.
 Rim with 5/8" flat oval, and rim with your choice of lasher, decorate with crisscross if you like with 3/16" flat oval.


Love your basket weaving tutorial. First time I've understood how to do this divider. Working on this basket right now for a wedding gift. Can't wait to see how it turns out.
ReplyDeleteHope it turned out well!!
ReplyDeleteThank you bunches for this pattern. Making for a friend birthday.
ReplyDeleteDo you have a pattern for a single wine basket using a D handle? Thanks! mcgathv@yahoo.com
ReplyDelete