we've had our patio furniture for a while now.. We where not good owners and did not cover them during the winter or the hot hot summer when we where not using them. The element has been really hard on them and the fabric where dirty and yucky so last year I thought I was sooo brilliant!!! lets wash them! Power wash them on low pressure and surely they will get clean! well, even though the fabric was water resistant and good heavy canvas it was no match for the power washer ... no matter if its on the low pressure setting. To make this long story short, it made the fabric weak and some parts had a little rips in it. well, we used it last summer and fall and winter came hard hard hard Indiana winter came, then spring and when we where ready to use them, these cushions where nasty as can be!! ripped and yucky but the frame where in great shape.
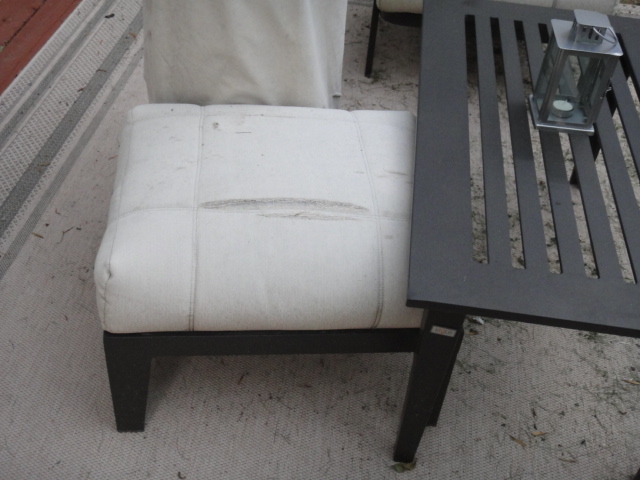
2 chairs and 2 ottoman, and a love seat all with over sized stuffed cushions! all yucky! Here are some pictures of them.
 |
| ottoman with a big rip!! |
|
 |
| Very tired chair | |
We thought about just pitching them and buying new ones but could not find a nice set as these that didn't cost a fortune! While contemplating on spending a fortune or settling for cheaper ones, my friend said why don't you just cover them up?? Well, why not! its a brilliant idea! went to one of my favorite fabric store Jo-Ann's with my hubby and we picked out this print by Christopher Lowell. (sorry not very goo picture)
Its outdoor canvas so it should be strong enough for the outside element but after working hard on these I am going to use a cover and make sure to keep them covered when its not in use! even in the summer! This will insure that they will last longer and keep them clean that we can sit on them as soon as we take the covers off! We also decided on tiling the table to give it a different look.
I looked around and originally wanted to do glass mosaic but I found out that they will cost a lot more then buying a new table, so decided to tile them. While at Lowes I saw really cute glass tiles, again too expensive to do the whole table.. I guess I can say I have good taste but if you are refurbishing a table, you don't want to spend more then what it would cost to buy a new table. after looking at all the different tiles we found these 6" stick on slate tile wannbes.

To do the table, this is a aluminum table, so first you need to sand the table so the construction adhesive will stick the backerboard to the table to make it a flat surface where the tiles will go.

glue the backerboard to the table and turn it upside down and put something heavy on it. Or you can use clamps if you want.
don't make the same mistake we did by marking the backerbords!! read the instruction on the self sticking tiles!! we had to prime it! 2X why? I don't know they said we had to so another trip to the Lowes later we where ready!
I forgot to take pictures when hubby glued the wooden strips to the side of the table!! He got stained wood strips and miter cut the ends and gorilla glued it to the side of the table. Clamped them with those strap clamp and let it cure over night. The next day we where ready to go!

Mark the center of the table but drawing a line from corner to corner. then top to bottom matching centering at the X . then start tiling, using the spacer.

So its done and its ready for grout!!
we grouted with ready to use grout because the instruction said so and because of the ease! we did not need a lot of it.. we still have tub full of grout.. maybe I need to find more things to grout so it won't go to waste??

grout, scrape, sponge Work little at a time,
Its done and we need to let it sit for 7 hours for sure before touching it! and in 7 days it'll be fully cured!
So we went from this .......
to

This! what do you think??
Its all done! currently, I'm working on pillows and Poufs I'll post again when I'm all done!!


 Not sure what they are really called but in Hawaii they called this dish Taegu. Maybe because the origin of the dish is Korea?? not sure but when I lived in Hawaii, I bought them at supermarket when ever I wanted to but in Indiana no such luck. So why not make my own? I know there are some made out of dried cod and also with cuttlefish or squid. I personally like the dried seasoned shredded squid/cuttlefish version so that's what I made today.