baskets

baskets

Saturday, May 28, 2011

gift basket

This week, I don't have a basket pattern for you but a look at what I gave my little one's preschool teachers for their end of the school year gift.


I had these apple wire so I made the basket I posted last week, and finished lashing them using 11/64 Flat oval and added tissue papers in the bottom, made these apple cake pops so I individually wrap them and then put 5 in each basket, and then a bag of brownie bites. (see the brownie recipe) they are yummy! and a card I made with card stock I had from scrap booking.


Spice Board Part 2

The Polymer Clay~  I love working with polymer clay but if you have a cold room or hands it gets quite tough! I use my clay conditioner to get it nice and pliable, and if its to crumbly I use couple of drops of softner.


Once you got the clay stretchy, roll into a cylinder if you are using the extruder,  put it in the extruder, fitted with the small holes die.  Push out the clay (this is the hard part)   Also if you have a cold hands or cold basement, I tend to have both, I use "hot hands" hand warmer.  You can buy them just about anywhere Walmart to Dollar tree! it will help keep your hands warm as you work with the clay, and or put a paper towel on top of the hot hands and put the extruded clay on there to keep it some what warm and soft. (especially when you work with thin pieces)

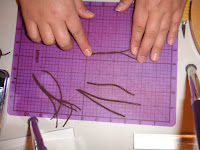
to make the basket, first roll out the dark brown polymer clay, cut out a shape of the basket you want to make, place it on a small parchment paper. then take 2 of the extruded piece, holding at each end, twist and roll to make a rope. continue making these ropes.  depending on the size and how you want your basket to look the number of ropes you will need will change.  If you don't have a extruder, you'll need to roll a small amount of clay into thin rope and once you have 2 thin rope, twist them together like I did to make a 2 strand rope.


 Make your basket.  you need to weave like you make the base of a real basket, alternating the ropes to a shape you like.  shape it and cut the excess off.


bake it using instruction on the clay.  I bake mine about 20mins on my Clay toaster oven, my oven runs really hot so I use it on a lower temp then what the instruction on the clay mentions.  I would test out if you are unsure of your oven because there is nothing worse then working super hard on intricate things like the basket and have it burn in the oven!!!  If they are baked correctly, when it first comes out of the oven it will be little soft but once cooled it will get hot.


Make the fence by using the flat small slant die.  extrude and cut the strips into about 2inches long.  you'll need about 14-16 strips and make a fence by laying them out diagonal spacing them evenly, then place the rest going the other way.  cut it in the size you want, bake and cool.
knead the silver and shape them in to water can shape, and trowel and hand rake.  add brown trim and handles, bake and cool.  Use any color you like to make the planter.  I used Pottery color, bake and cool as well.

Come back next week for part 3 Placement and decorations!

Happy Crafting!

Friday, May 20, 2011

no bake coconut cream pie

My little one has been bugging me to make him a coconut cream pie since he saw it on i-cary (one of his favorite shows) The episode is about a pie shop owner passes away, and the gang wants the recipe yatta yatta yatta they find it and all is well.  I've never made coconut cream pie so I looked on the web and found several interesting recipe, some has whipped cream on the top some has meringue on top. But all has tons of ingredients and I really was in a mood for simple quick recipe.. so I kind of winged it and looked in my pantry.. ahh.. I have graham cracker crust, I have vanilla pudding, sweetened coconut shred, milk and whipped topping in a can! made the vanilla pudding with 1/2 cup shredded coconut, pour in the graham cracker crust, in the fridge, once chilled cut a piece out, onto the plate, blasted with a whipped cream and you have quick and easy coconut cream pie.  I know its the real coconut cream pie but its quick its easy and its sort of like a coconut cream pie!

simple custom baskets

Its the end of school year and I wanted to give my little one's Pre-K teachers a thank you gift and decided to give them a handmade basket with a cake pops in them.  I looked through my basket pattern books and could not decide what kind of basket to make... days past by and Oh my there is only a week left in the school year!!! I found these apple shaped wire which I wanted to incorporate it so figured to make them a rectangle shape basket. (I know some teachers don't like apples but that's what they are getting)  I wanted a basket about 8X4.5" which I thought would be a multipurpose, handy, useful size.  though I could use 5/8" reed and use less stakes but I went with 1/2" since I have lots of 1/2" in my scrap and lose bin. So I did some calculation, base length or with + 2 height of the basket + extra for tucking and came up with 19.5"(cut 5) for long piece, 16" (cut 9)for the short and 12" long 3/8" (cut 4)flat reed for fillers.  Mark all pieces on the center on the rough side.

laying out long pieces horizontally, putting the filler pieces in between them lining them up on the center line.  take the short piece and weave over the filler piece and under the long piece over the center line. weave 4 more on each side of the center piece.  Base should be 8X4.5" now cut the filler piece in half long ways to the nearest vertical stake on both side. fold and tuck like the illustration.

twine using either no 2 or no 3 what ever you have laying around is fine, I used colored just because I think its cute, you can use dyed or natural its your choice, it is your basket.

spray down your reed to make sure they are not brittle, upset stakes, and start weaving with what ever you like, have on hand and rim and twine! you have your custom one of a kind basket.  I still need to lash it, I'm going to do that later tonight but here is is..


I used 3 rows of 3/8"flat and 3 rows of 1/4" dyed piece. the blue was little bigger.. maybe it was 7mm not sure, and the green was 1/4"Flat Oval, because that's what I had on hand. Then two more row of 3/8" then a 1/4" as a rim row, rim with 3/8"flat oval.  I think they all turned out cute.. minus the lashing.. I think I will lash with 3/16 or 11/64 flat oval.  Oh I also used no3 seagrass as a rim filler. 

Monday, May 16, 2011

Spice Board Part 1

My friend's finished spice board
Not sure what you call it in America but my Japanese friends calls them Spice Board and they all make something like this in US before moving back to Japan.  I recently had the opportunity to start making one of these so I wanted to share with you the steps to make one of these things.  I will be doing this in several parts so come back next week to see part 2!

Things you'll need:

wooden board of your choice (I got this noodle board from viking woodcrafts  its the 8-3/4"X 11-1/2")

polymer clay in dark brown, lighter brown or terracotta color for pot (I used terracotta color for my pot) and silver

miniature empty bottle from doll house accessory (I got mine from Hobby Lobby if you don't have one
near you can order online)

dried spices and fresh herbs.  (for this project we used dried star of aniseed, tri-colored peppercorn, poppy seed, fennel, mustard seed, cloves, sesame seed, cinnamon stick, and chili pepper, fresh rosemary and parsley.

alphabet pasta and thin spaghetti (I found my alphabet pasta at a Mexican grocery store)

8oz of Pour on finish which can be purchased at your local craft store using coupon or at hobby lobby online.

if you have a clay extruder, life would be easier making these shapes but its not necessary to get the similar effect.

Now that you have all the supplies you need, you're ready to make a spice board with me! I'll be back next week with part 2 working with polymer clay!

Friday, May 13, 2011

Nuts!!

Recently I saw a basket on Basketmaster's Weaving (you can see her basket on her blog) which intrigued me! I've never seen it before and did a little research and found out that its called a nut basket or peanut basket.  So combed the web and found something similar for free.  free basket patterns.  scroll to the middle its on there.. Anyway I got a little confused so I kind of winged it and made it as not as tall as the pattern but here it my altered version of peanut basket. I think next time I may use the solid wood bottom just so you don't get as much little nut junk on the table.  I will continue my search for other version but so far this was the only pattern I could find for free.    Happy Weaving!

Friday, May 6, 2011

Basket Thursday but its Friday!

I had one of those busy week and I was too tired and worn out by the end of the day that there where no way I was going do anything other than be a vegetable.   So here I am on Friday eve posting about one of the basket I completed this week instead of something sweet. I'll post about something sweet later this weekend.  I found this pattern for free as well, isn't the internet great?? When I first started weaving, we had computers but that was mostly for e mail and chat, and back then I thought it was the greatest thing in the world!!  Am I sounding ancient? Enough about good ol' days.  Lets get on with the basket weaving!!

I think this basket  its one of the cutest basket I've ever seen.   The picture on the free pattern page makes the basket look quite tiny but its actually bigger.. here is my basket I finished.
cute right?? anyway you can find the free pattern here at Bases to weave as with any other sites that offers free pattern you can find the supplies on their site.  The flowers you see on them are brads from scrapbook supplies.. any hobby/craft store carries them.. Just don't make the same mistake I made.. I purchased the mini brads thinking the basket was small, had to go back and find the bigger ones.  P.S. you can tell just about how big they are by looking at my hand.   I can't wait to show the girls next week when they come over for weavefest! Surely they'll all go nuts over it!

Monday, May 2, 2011

Lost in translation

The other day I was in search for couple of things... 1. alphabet pasta 2. Dr Oetker's clear glaze.  So I decided to go to different market around town.  There's this market near a Asian market I frequent called Swagat or something like that.. don't know what Swagat means but I gave it a try.  It was a Indian market.  I walked around there looking and things I've never seen before.. I came to the snack area and saw several interesting things so I purchased them to try them just because it was interesting.
 This is made by Lay's in India.. its obviously, its potato chips but what I want to know is what is "Magic Masala" ?
 see its just potato chips.. I tried some but it was not a "Magical" experience for me.


Then this one called Kurkur, its saucy tomato flavour....

   looks like cheetos


but apparently its a Naughty Tomatoes
Not sure what the deal with the tomatoes with big lips and the cheetoes like snack as horn is but this also was not my cup of tea.


 Nissin Top Ramen made in India apparently is "Smooth"
 this cookie has a "Fun Center" not sure what's in 
the center since I have not tried them yet but apparently its "Fun"!!


This is coconut flavored cookies you're supposed to eat it while having a nice time or maybe you'll have a nice time eating this??


can you read the fine print? its sugar showered!


see! sugar showered!


I didn't know Tomatoes can be Tricky
and this curry noodle must be really spicy because its Thrillin' Curry!


Every country has a certain flavor that we enjoy and that's the reason why I did not find these Indian snacks too tasty but it was fun finding them and trying them! Oh! I almost forgot! I found the alphabet pasta at a Mexican market and I am still in search of Dr. Oetker's clear glaze!  I may ask World Market to order some since they carry other Dr Oetker's products.