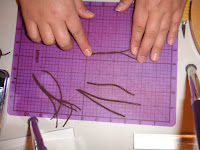
 The Polymer Clay~ I love working with polymer clay but if you have a cold room or hands it gets quite tough! I use my clay conditioner to get it nice and pliable, and if its to crumbly I use couple of drops of softner.
 Once you got the clay stretchy, roll into a cylinder if you are using the extruder, put it in the extruder, fitted with the small holes die. Push out the clay (this is the hard part) Also if you have a cold hands or cold basement, I tend to have both, I use "hot hands" hand warmer. You can buy them just about anywhere Walmart to Dollar tree! it will help keep your hands warm as you work with the clay, and or put a paper towel on top of the hot hands and put the extruded clay on there to keep it some what warm and soft. (especially when you work with thin pieces)

 to make the basket, first roll out the dark brown polymer clay, cut out a shape of the basket you want to make, place it on a small parchment paper. then take 2 of the extruded piece, holding at each end, twist and roll to make a rope. continue making these ropes. depending on the size and how you want your basket to look the number of ropes you will need will change. If you don't have a extruder, you'll need to roll a small amount of clay into thin rope and once you have 2 thin rope, twist them together like I did to make a 2 strand rope.
Make your basket. you need to weave like you make the base of a real basket, alternating the ropes to a shape you like. shape it and cut the excess off.
bake it using instruction on the clay. I bake mine about 20mins on my Clay toaster oven, my oven runs really hot so I use it on a lower temp then what the instruction on the clay mentions. I would test out if you are unsure of your oven because there is nothing worse then working super hard on intricate things like the basket and have it burn in the oven!!! If they are baked correctly, when it first comes out of the oven it will be little soft but once cooled it will get hot.
 Make the fence by using the flat small slant die. extrude and cut the strips into about 2inches long. you'll need about 14-16 strips and make a fence by laying them out diagonal spacing them evenly, then place the rest going the other way. cut it in the size you want, bake and cool.
 knead the silver and shape them in to water can shape, and trowel and hand rake. add brown trim and handles, bake and cool. Use any color you like to make the planter. I used Pottery color, bake and cool as well.
 Come back next week for part 3 Placement and decorations!
Happy Crafting!


No comments:
Post a Comment