 I wanted to share with you how I carve a pumpkin. There are many different ways to carve and I don't think there is right or wrong way just like weaving basket and this is my way and I've been doing this way for a while. Each year I get pumpkin for each one of us, hoping for one day able to carve our own pumpkin and have a contest to see who carved the best pumpkin but somehow I always end up carving all the pumpkin each year. Each year my husband would ask me to carve his, and make a Red Wings logo, Each year I carve him one. Last year I went with Al the Octopus (Red Wings mascot) but all the other year it has been pretty much Red Wings. I think I may have carved him Luther's seal many many many years ago but for the last 5- 6 years it has been Red Wings. So this year when I saw this giant pumpkin that looked like it was taking a nap, I thought it would be perfect for Red Wings logo
If you already know what you want to carve, picking out the pumpkin is easy. If you are doing a traditional Jack-o-lantern then any pumpkin. After you pick out your pattern and pumpkin, match the pattern to fit the pumpkin by re-sizing the pattern.
Not sure which is the better option like the traditional cutting the top off and scraping out the guts.
Take the top off, trim it and then scoop out the guts!
its all clean!
Or my cutting out the bottom of the pumpkin or where it will be the bottom (I do it this way now)


start by cutting the bottom of the pumpkin or where it will be on the ground or a table in a angle and go around . Pull off the opening and cut off the stringy seedy mess, scoop out the guts and scrape a little to make your carving easier just like if you cut the top.
either way you cut the pumpkin you'll need a pattern, which you can find on the internet for free or make your own. tape it to your pumpkin. (you can also free hand by drawing on the pumpkin its up to you.

 Some carving kits comes with a pattern poker to poke around the design to mark where you are supposed to cut but I get confused when doing intricate designs so I use a knife to cut out the paper and mark the pumpkin at the same time. This way you know you don't miss a thing.

Hard to see on the picture but you should see a cut out line. this is where you "saw it out" with what??
with these tools I use!


after sawing you'll get something like this. then I use this tool.. its wood carving tool but comes in handy for pumpkin skins. If I notice my saws going dull or to bendy, I buy one after Halloween on 75%off and save it for next year. Wood Carving tool will last a long long time. I've had these for about 4 years and still going strong!


After scrape off the orange skin then use something like this to smooth out the white flesh. Here on the right is a polymer clay tool
Happy Halloween!
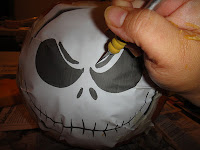
my 5 year old carved this one using the little pumpkin he got on a field trip with his Kindergarten class
HAPPY HALLOWEEN!


No comments:
Post a Comment